Making assets Pt2
Texture (Continued)
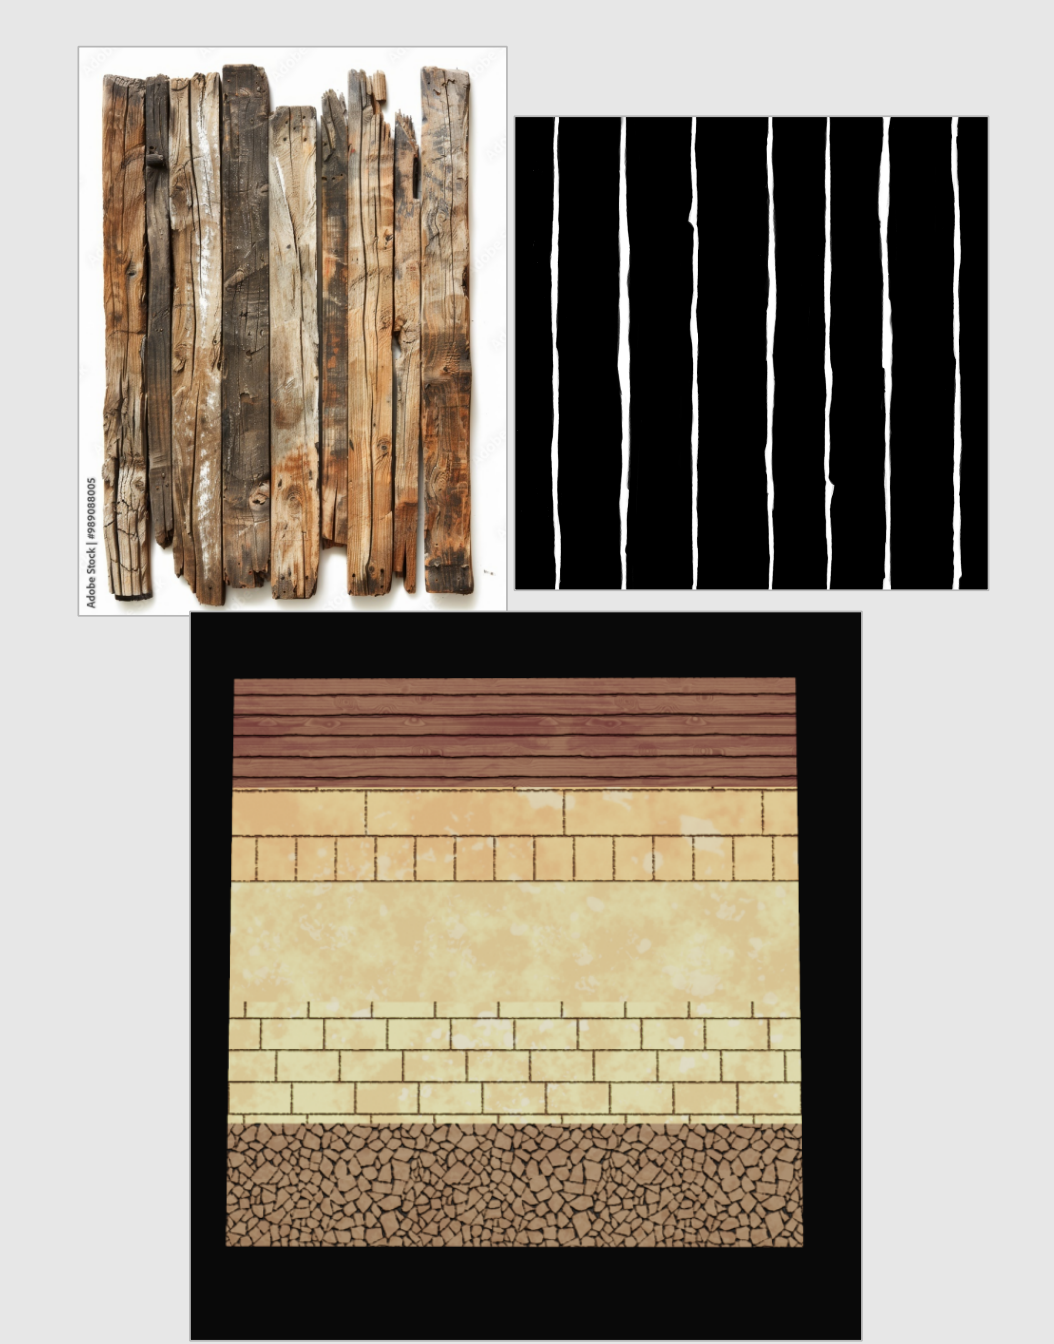
Previously on the trimsheet texture, I only shown half of what I did. For the wooden plank texture, I find wooden plank texture online so I can quickly produce a mask for the silhouette of the planks. Once complete I give it the same treatment as the stone floor and export the texture. The trimsheet is somewhat complete but further a test.
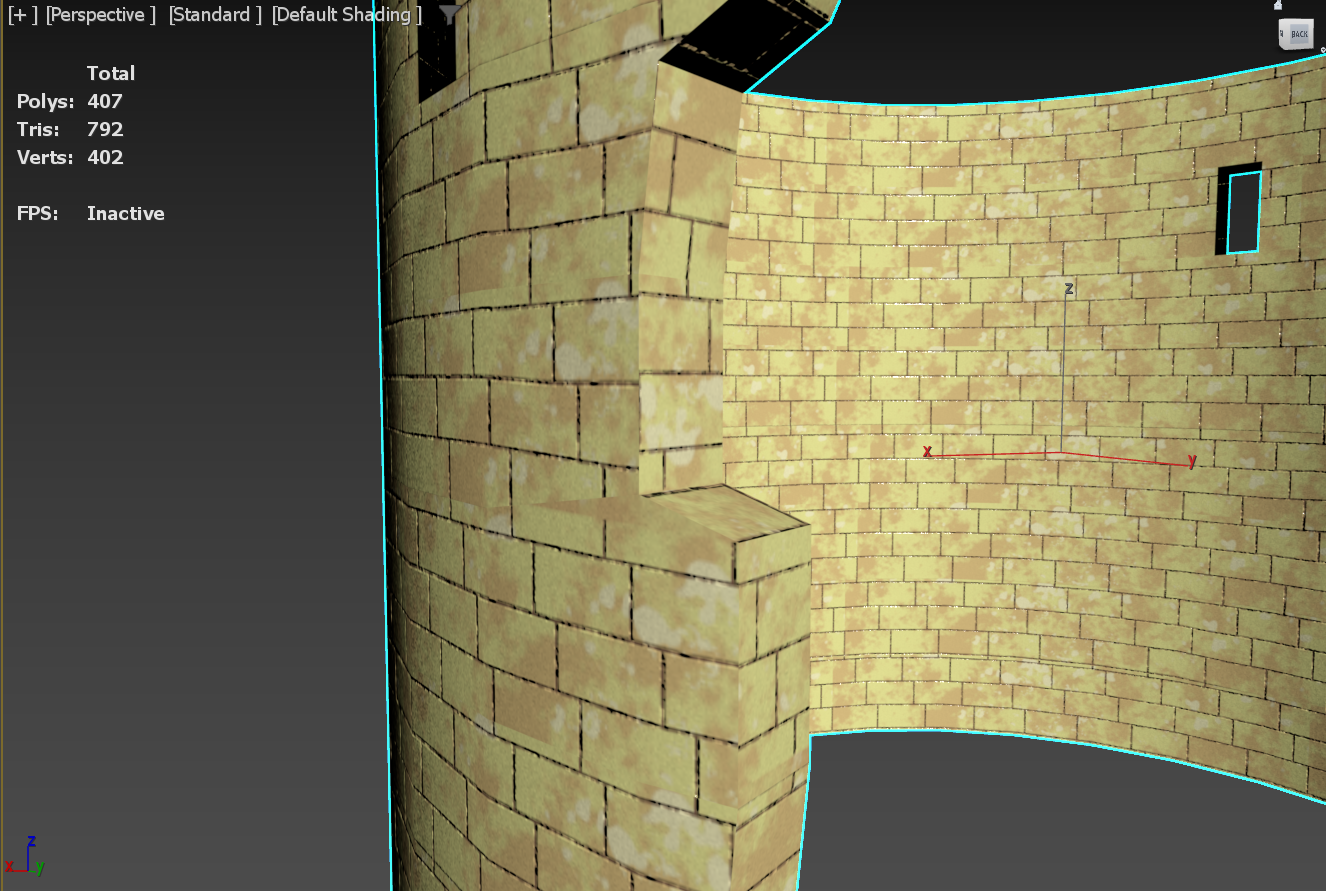
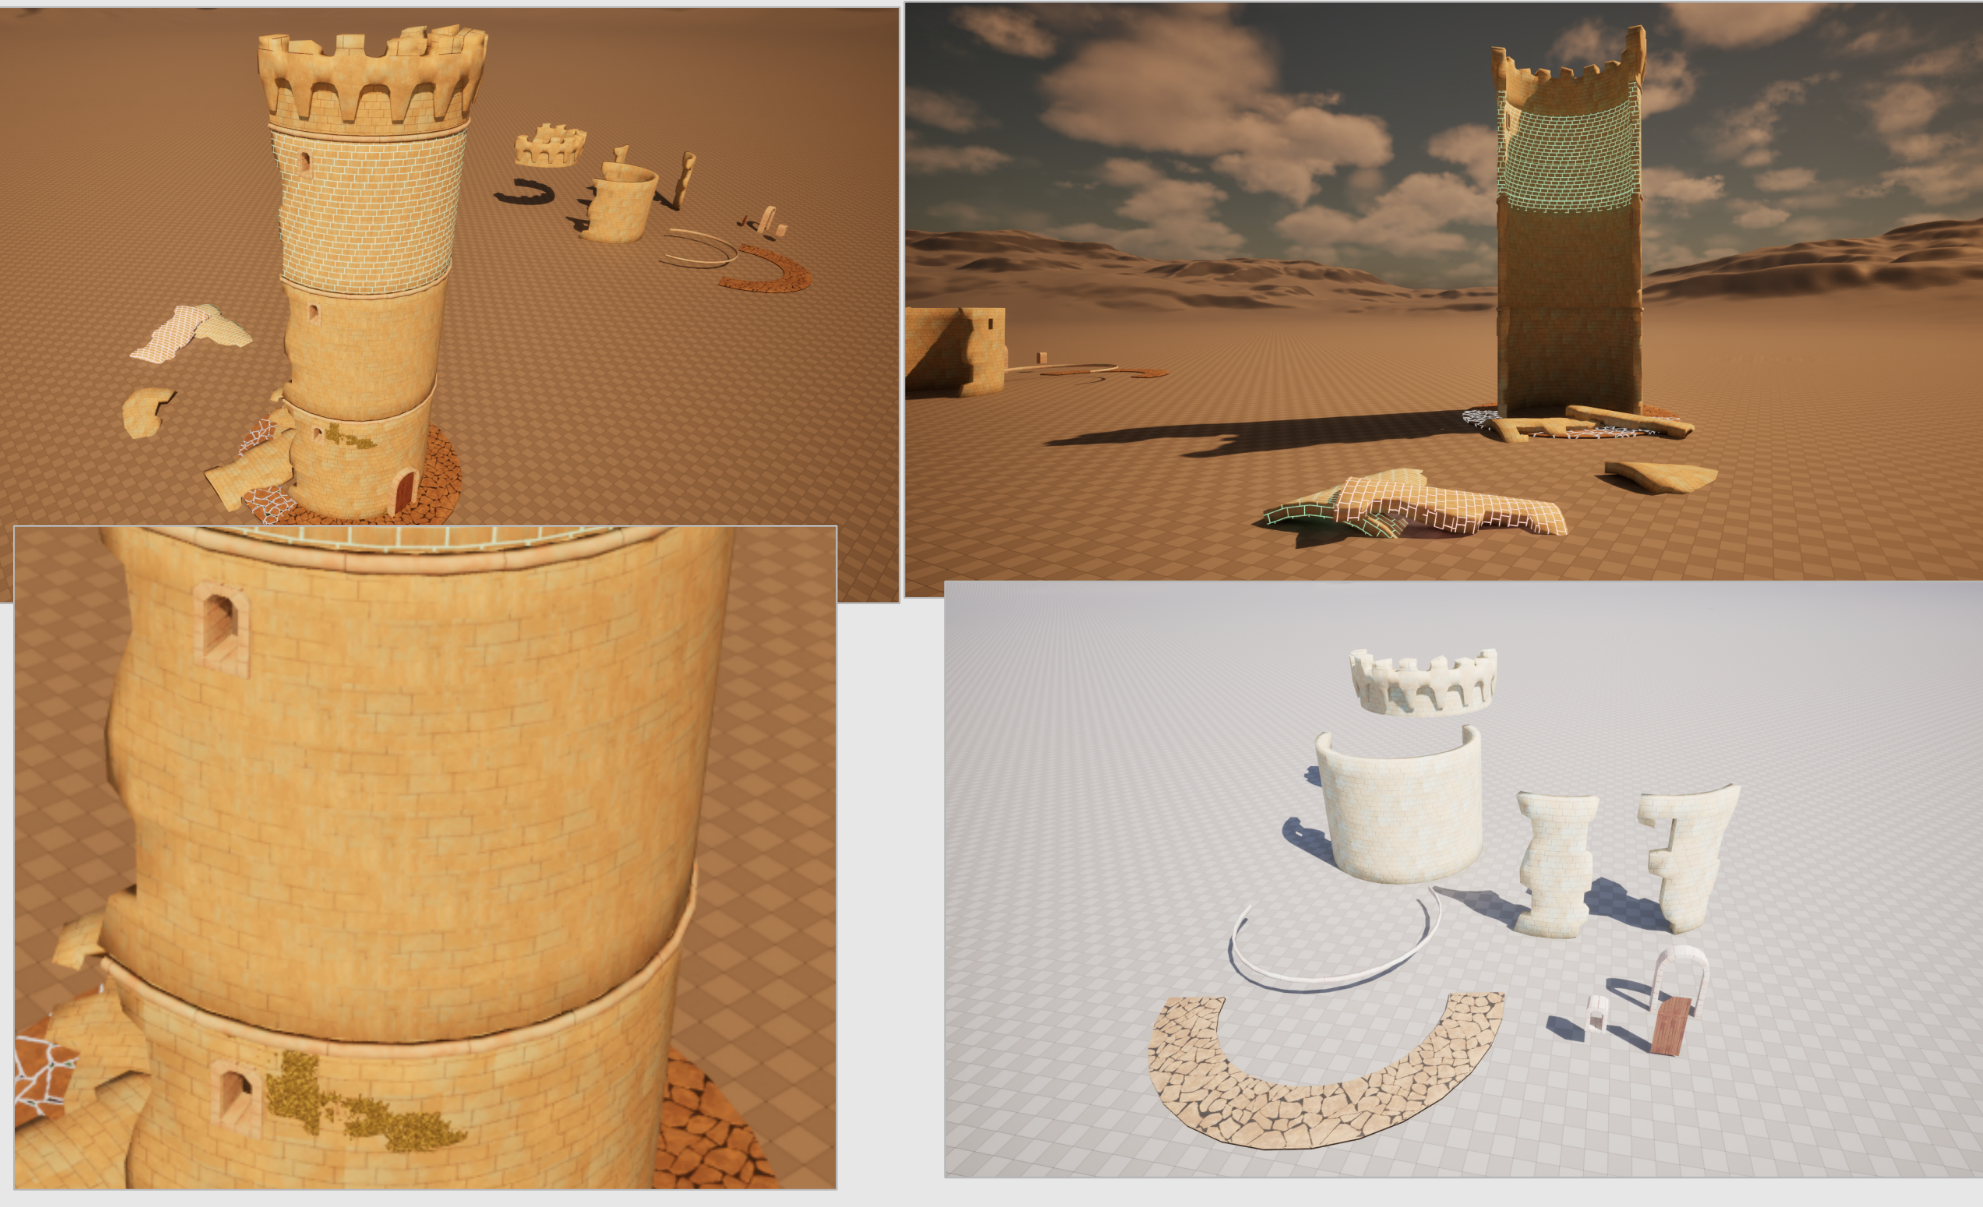
I bring it back to 3DsMax to properly align the texture to the trimsheet. I learnt quite a lot of new things here. I assigned all the modular model with the new textures, aligning UVs is a really slow process. I am glad I made most of the edges straight as possible so that it doesn't protrude the edge of the texture, it is also a good thing to not bust the 3k triangle limit beforehand.
My problem faced was the brick wall textures for the uneven edges, its tricky to get all sides of the texture to look natural but I try to match it as much as possible. Then there is the texture tiling problem, I did not foresee the obvious repeated grunge texture around the wall. This have to be properly hid by adjusting the texture or by adding objects to break the illusion like foliage.
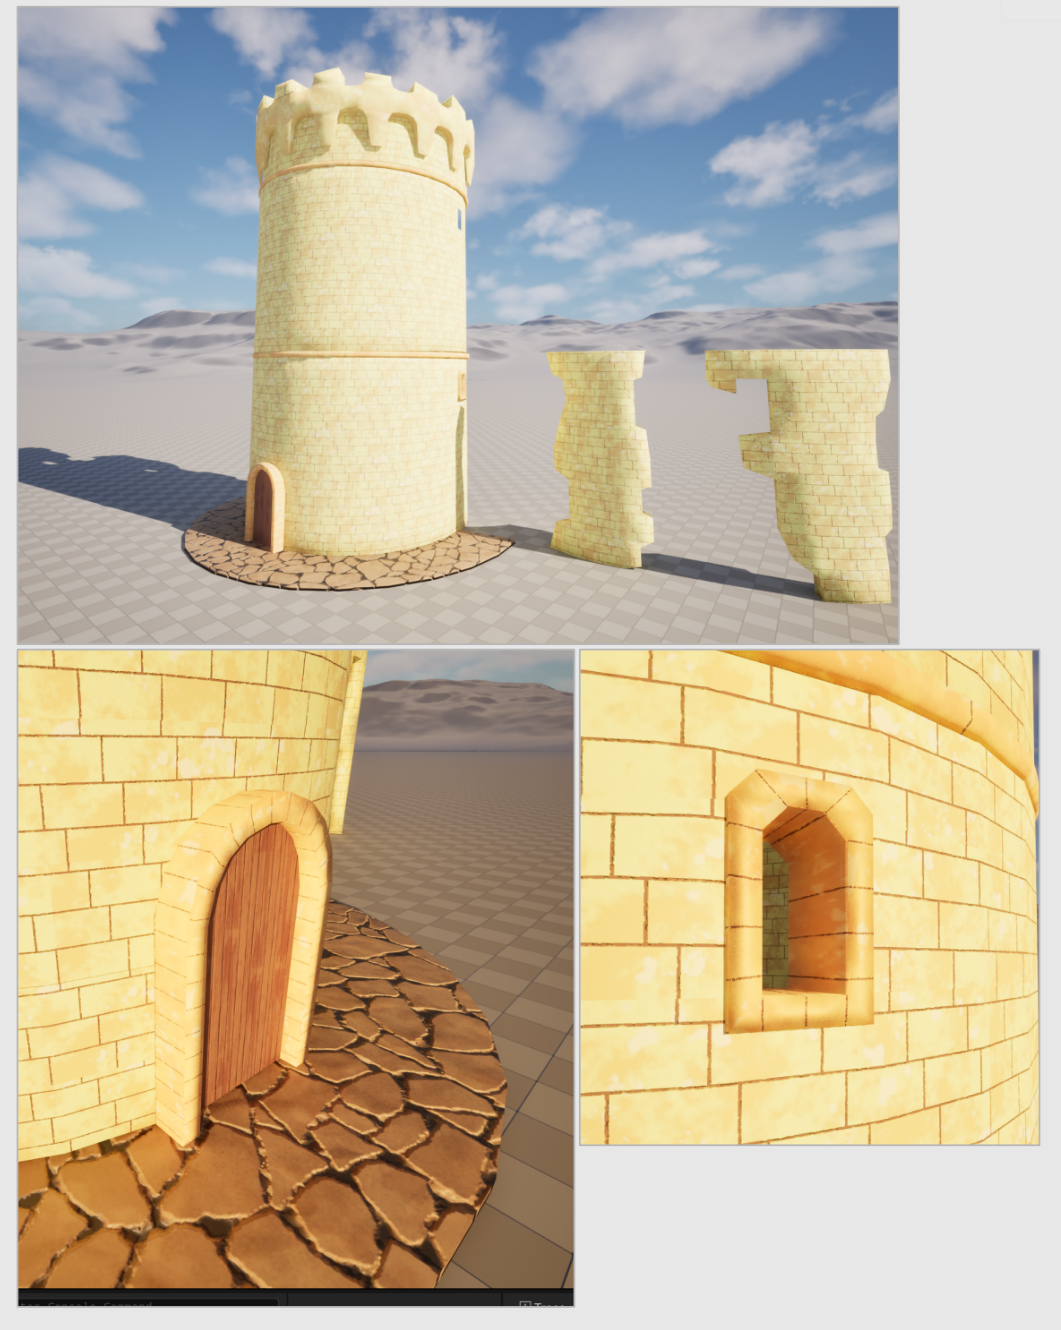
Upon bringing it to Unreal Engine, a couple more problems appear. The stone floor texture is not ideal for visual, windows, door and texture is too yellow. I searched for a better reference and reworked the texture, added chamfer to windows and door frame. I even have to fix the UVs that are obvious.
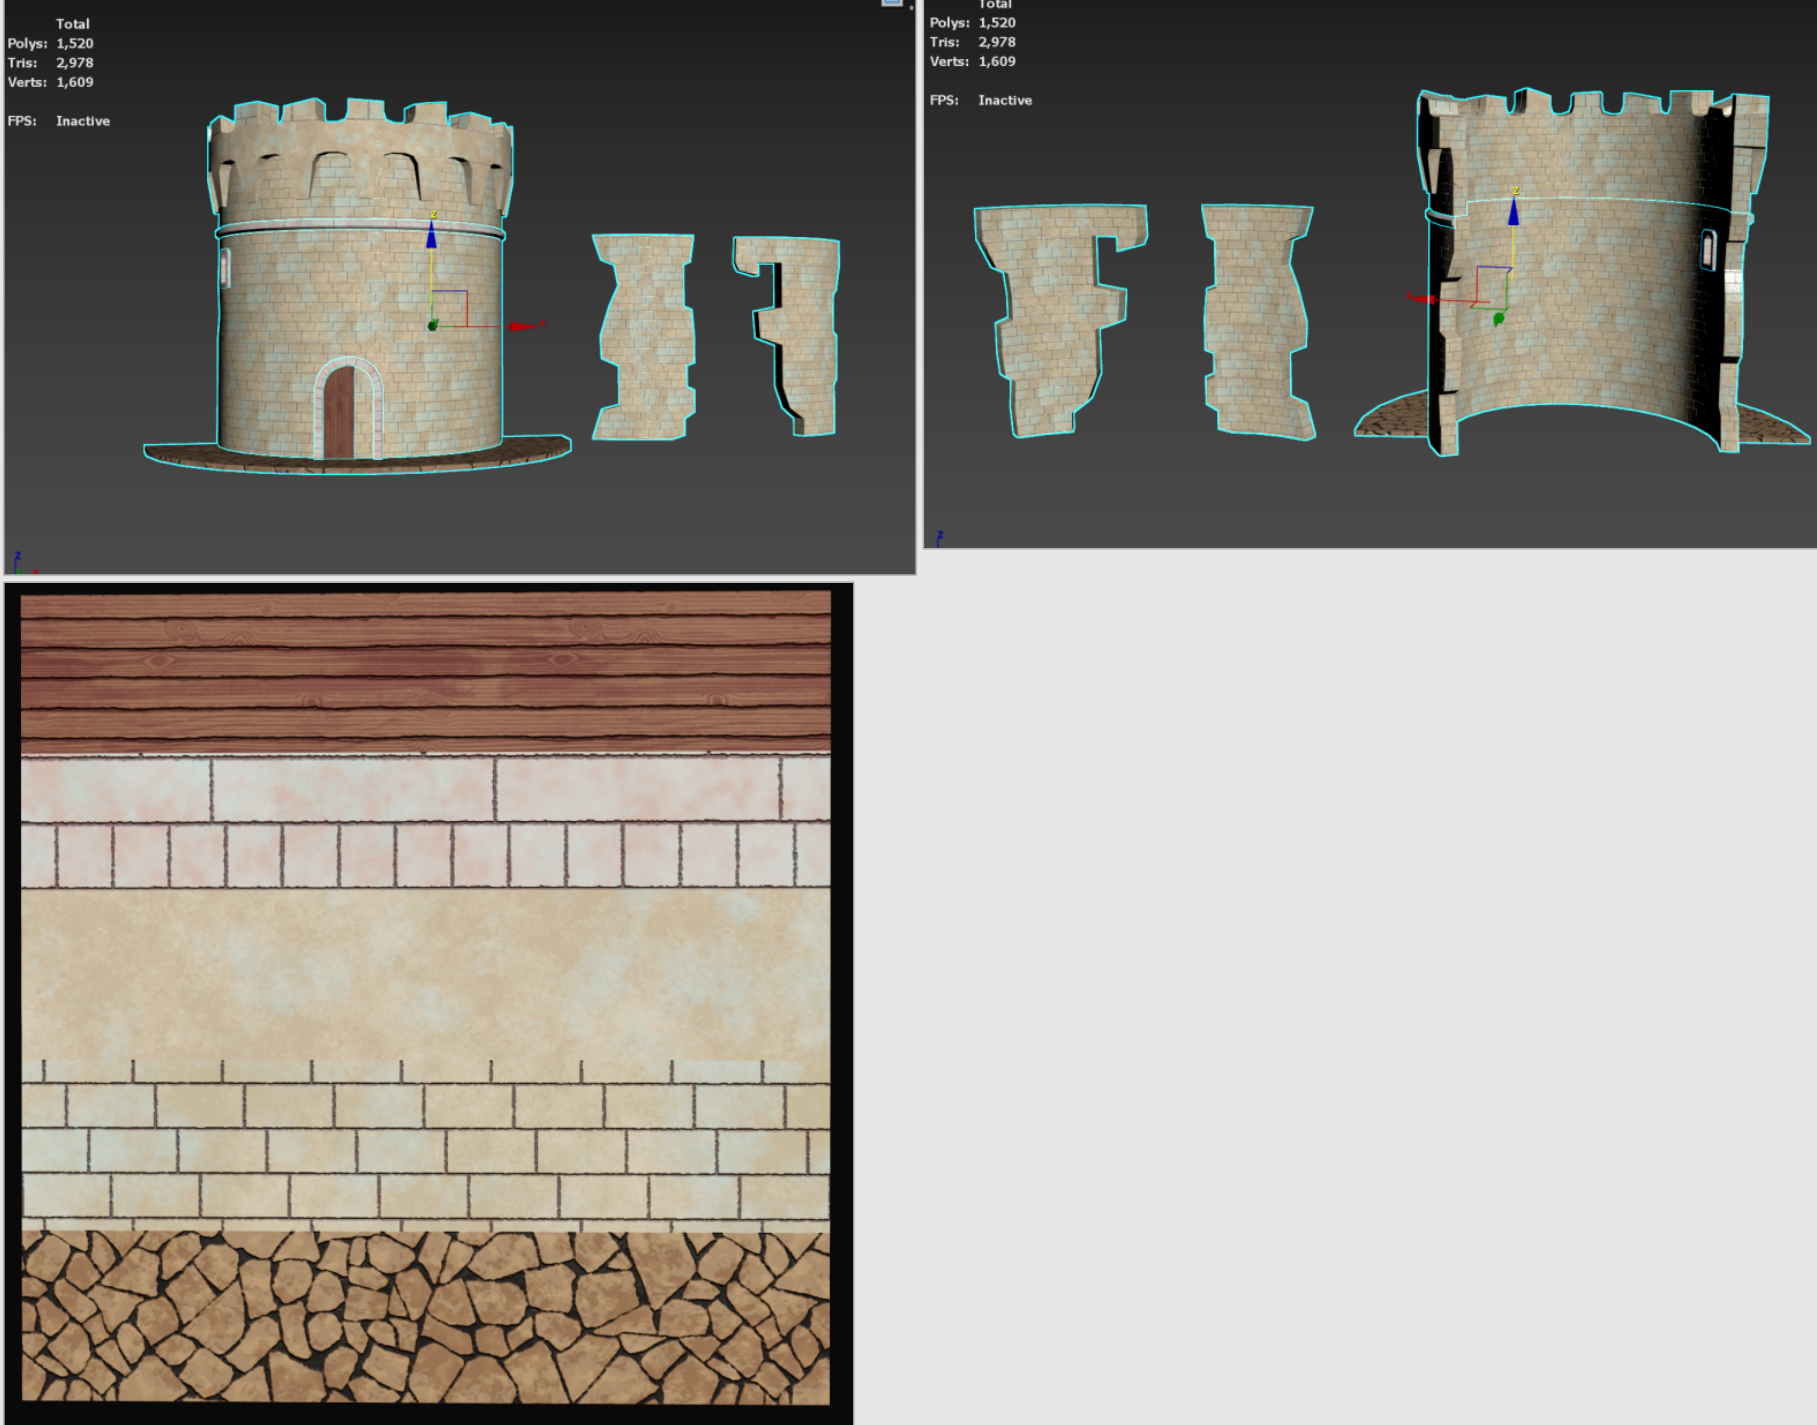
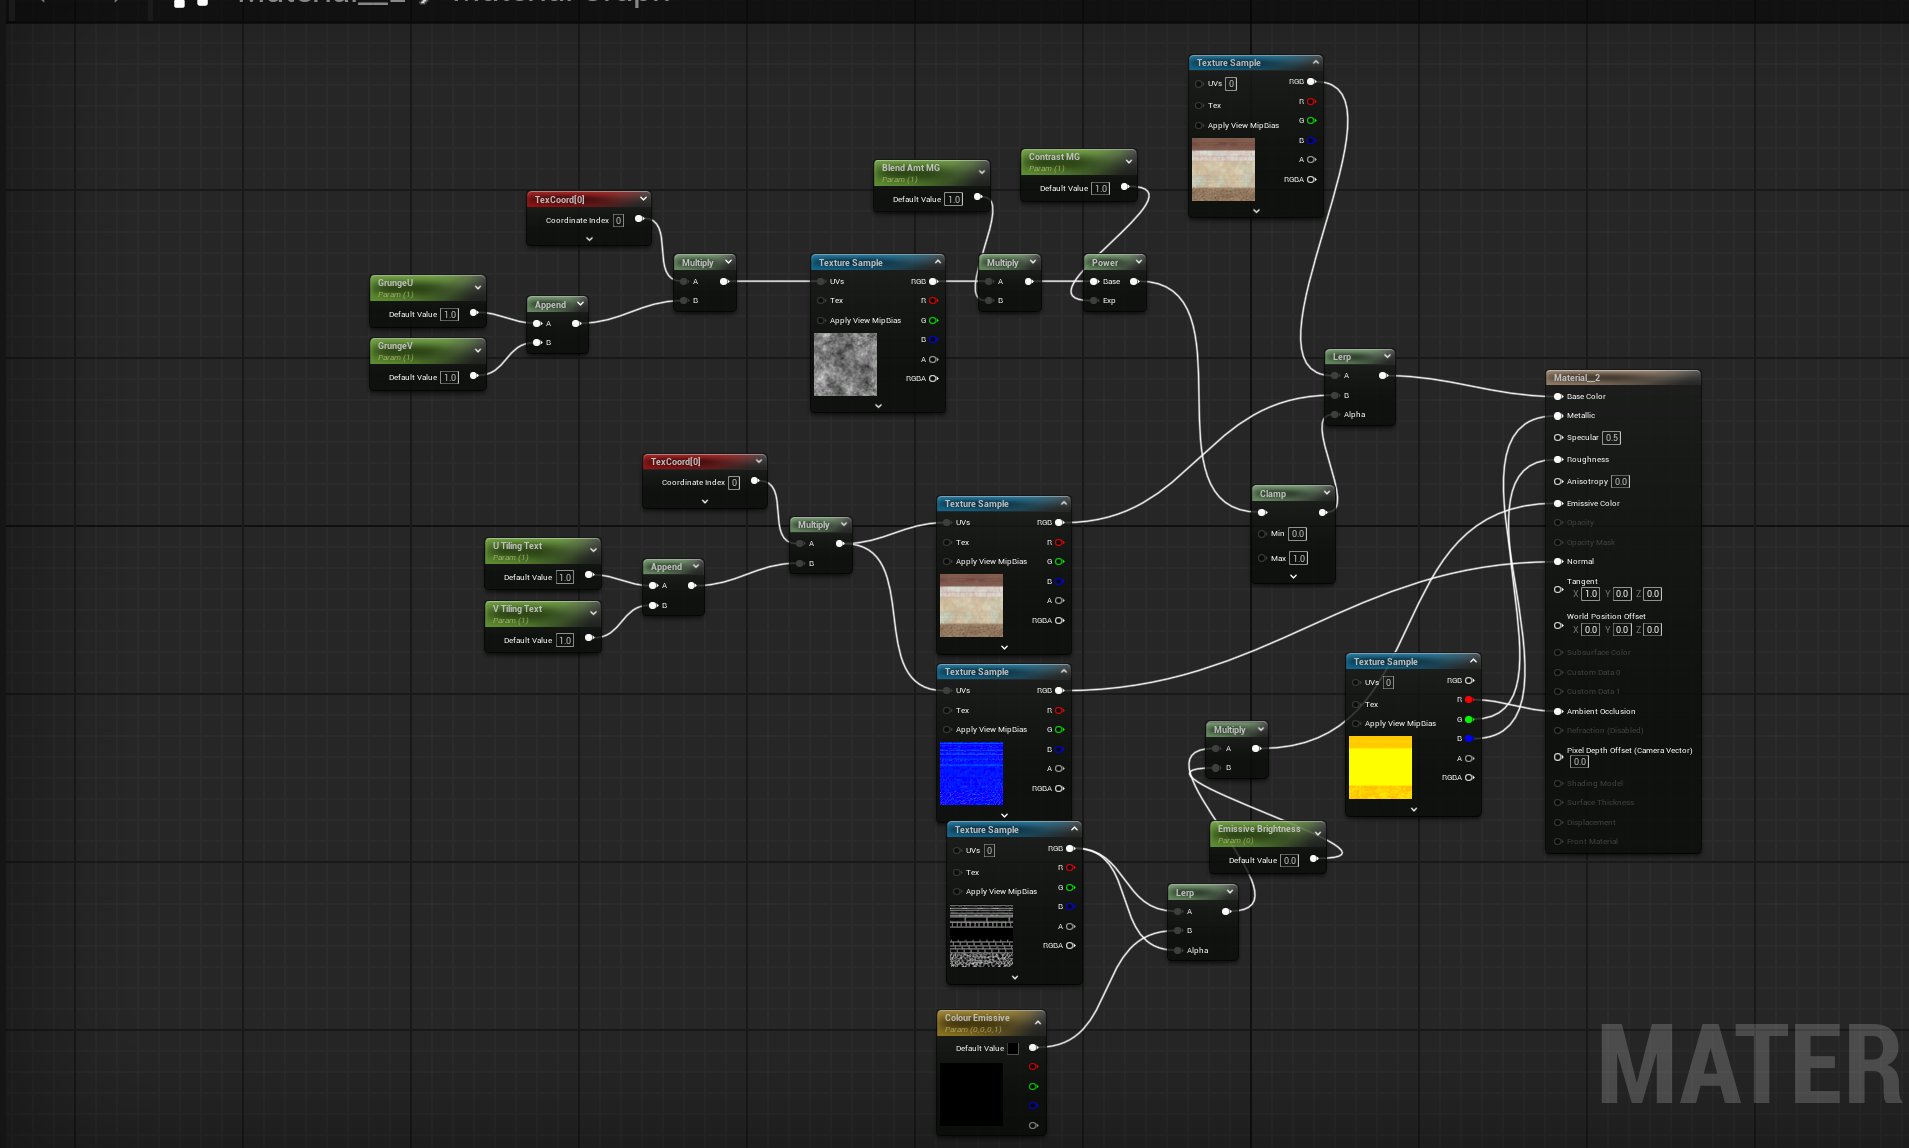
After the fix, the new triangle count is 2978. Repeated mesh was deleted so that the window and door frame can be chamfered. Once the result is better in Unreal, I proceed to modify the material using the material editor. As it turns out, the noise texture used from the previous final project was useful in hiding the obvious tiling. I added emissive via heights in Substance Painter so that it can be adjusted or customised later on.
Afterword:
As it turns out, trim sheet is a big challenge as compared to doing hero assets. It relies on huge planning and execution to accomplish it. In this exercise, I went through the process with only small success in certain area notably making mask for stylise textures and blending it with noise alpha. My biggest flaw is the planning as I ended up spending hours on aligning / correcting UVs and textures painfully. On future note, I think the correct work process should be:
- Research and identify all model
- Find the common material and separate hero assets
- If the goal is to keep resource low, prioritise assets that requires more details and keep the rest minimal. Balance the economy so the it does not surpass the budget.
- Monitor, check and correct things before moving on if can.
Leave a comment
Log in with itch.io to leave a comment.